Get Your Free Gemini API Key in 5 Minutes 🔑
Google AI Studio offers a completely free API key — no credit card, no billing setup required. This guide walks you through every step.
Why do you need an API key?
SnapFill Pro uses AI to generate your cover letters, decode job descriptions, and draft application answers. To do this, it needs to talk to an AI model. Rather than charging you a subscription, SnapFill Pro lets you bring your own API key — meaning you connect directly to Google's Gemini AI using your own free account. Your key stays in your browser. We never see it.
Why Gemini?
Google Gemini's free tier (via AI Studio) is the most generous free AI API available today:
- ✅ Up to 60 requests per minute
- ✅ No credit card required to start
- ✅ Completely free for personal/low-volume use
- ✅ Google-grade performance for application writing
Step-by-Step Guide
Open Google AI Studio
Open a new tab and navigate to: aistudio.google.com — This is Google's official developer portal for Gemini AI. It's free to use with any Google account.
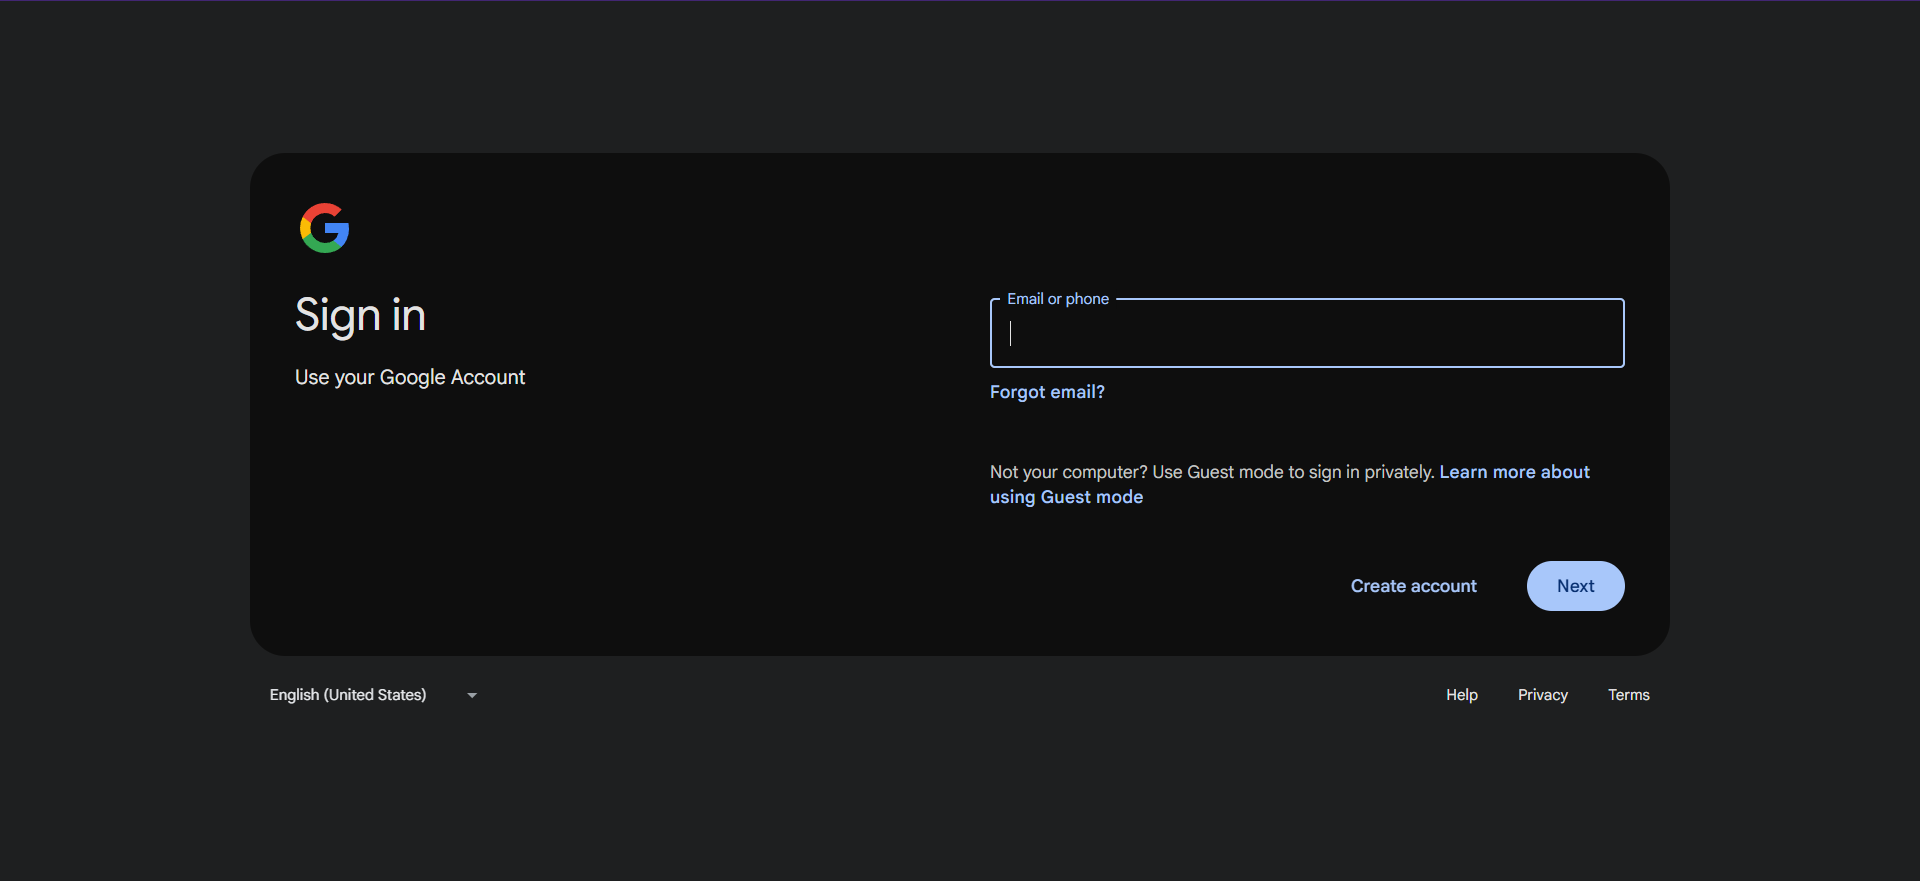
Sign In
Click the 'Sign In' button and log in with your Google account. If you're already signed in to Chrome, this may happen automatically. You may be asked to agree to the Google AI Studio terms of service — accept to continue.
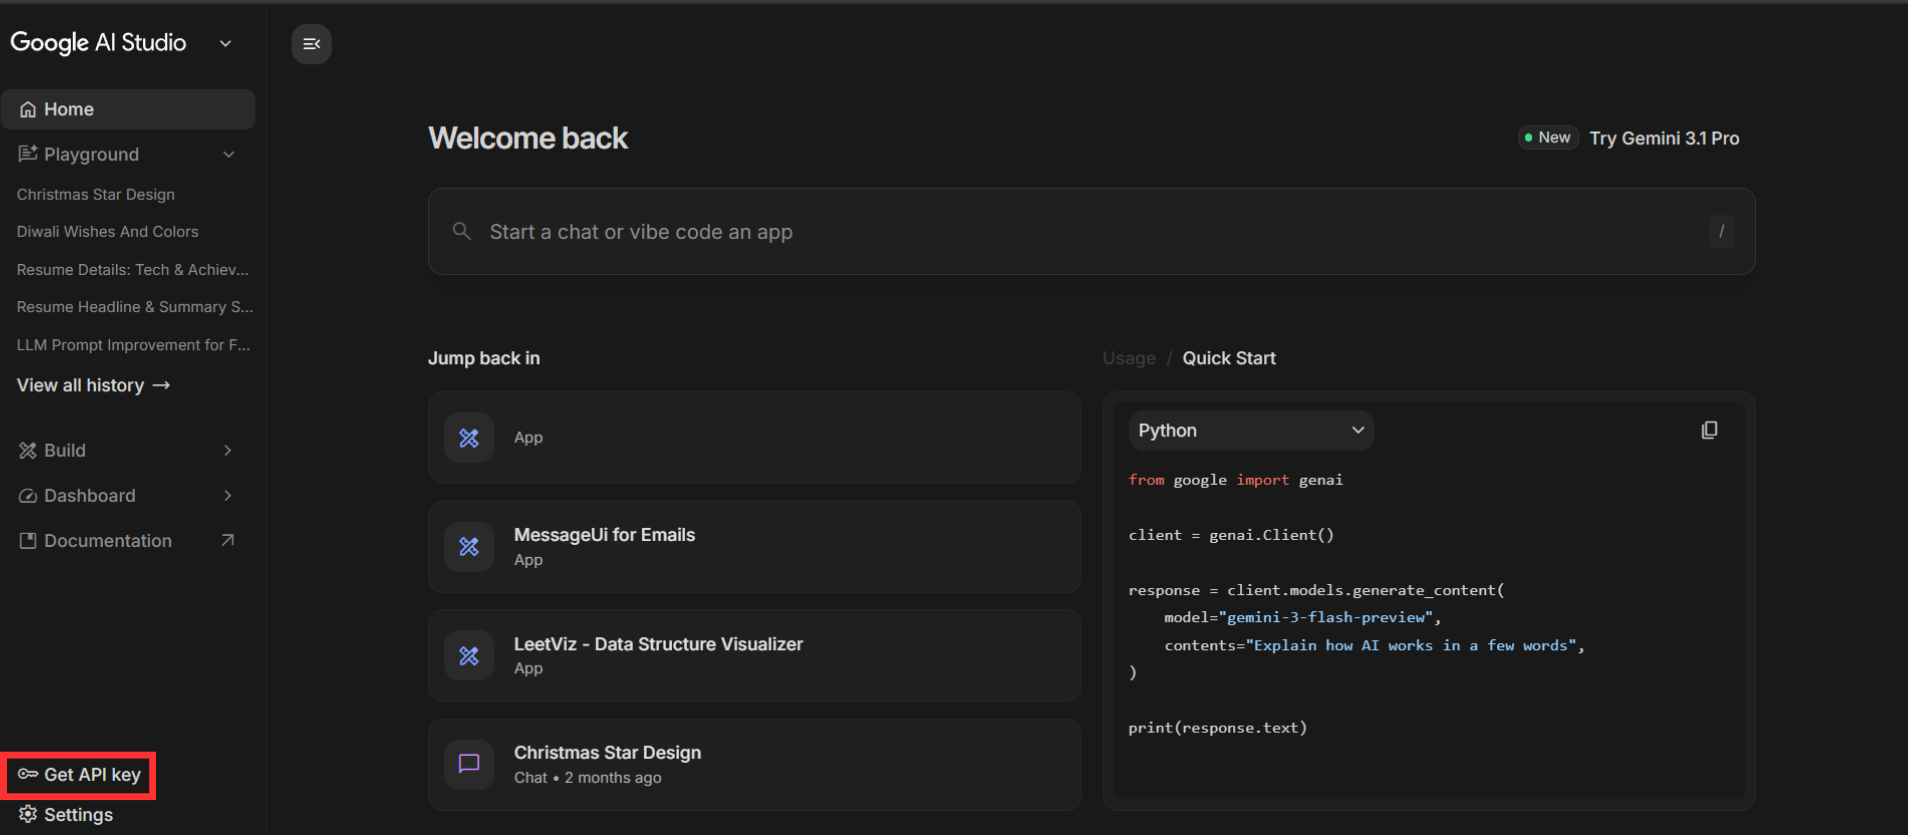
Find the API Keys Section
Once inside AI Studio, look at the left-hand sidebar. Click on 'Get API Key' — it is usually listed near the top or bottom of the left navigation panel. This will take you to the API key management screen.
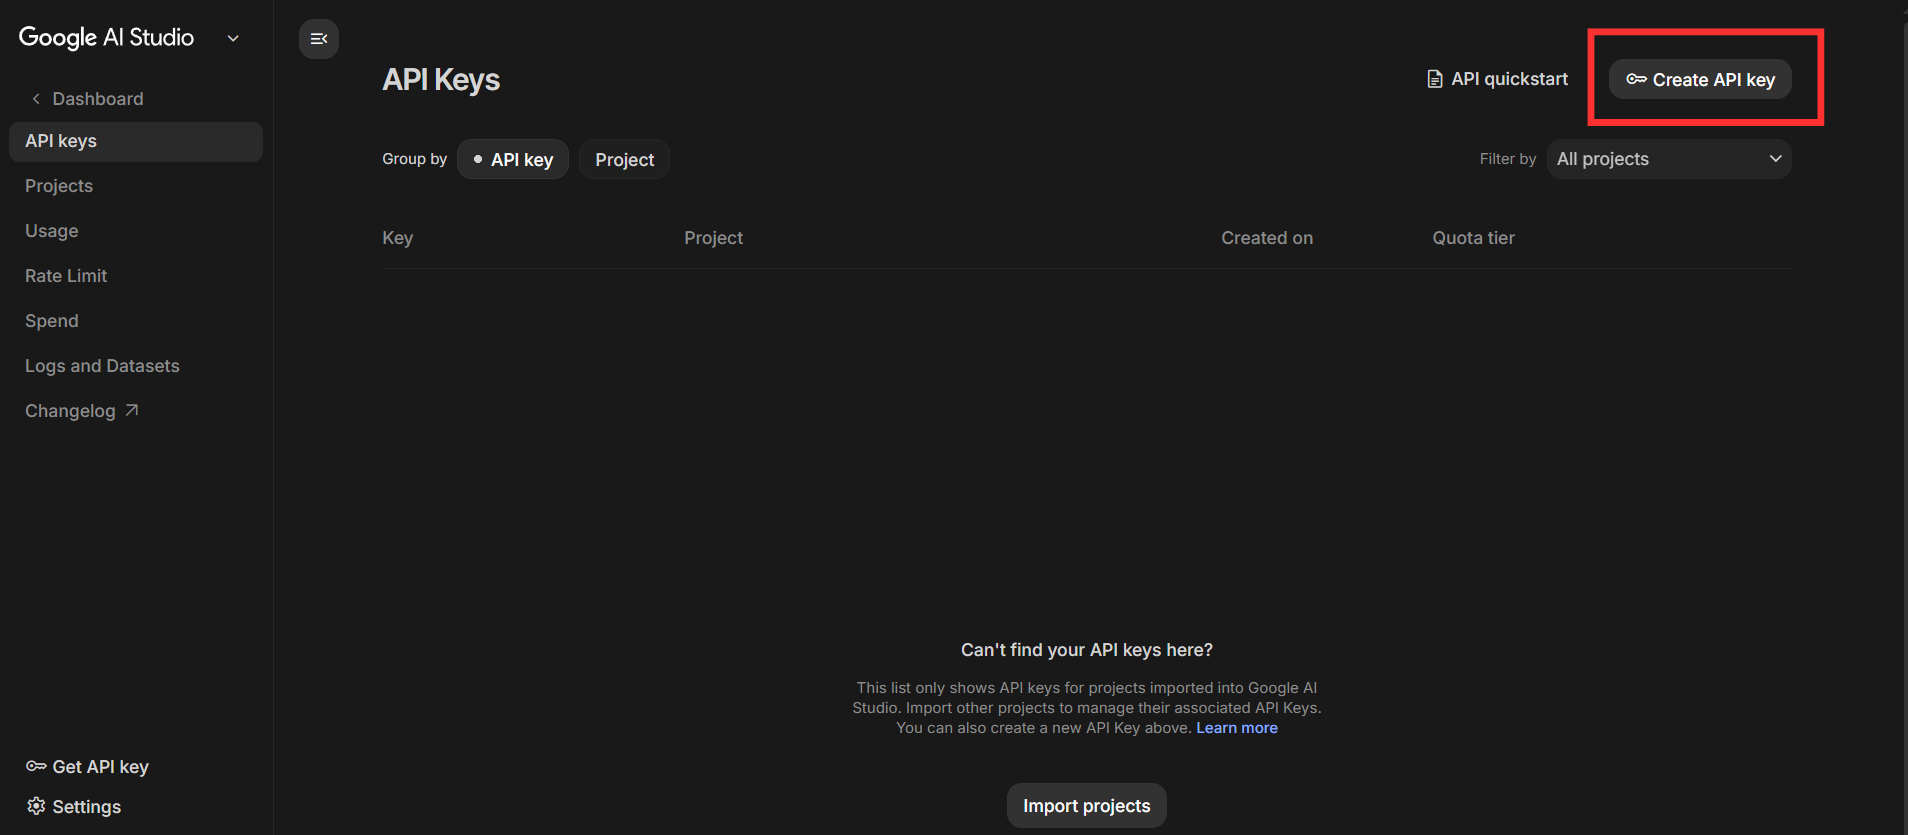
Create Your API Key
On the API Keys page, click the blue 'Create API Key' button. Google will prompt you to either create the key in an existing Google Cloud project or create a new project automatically. For most users, clicking 'Create API Key in new project' is the simplest option — Google handles the project setup for you.
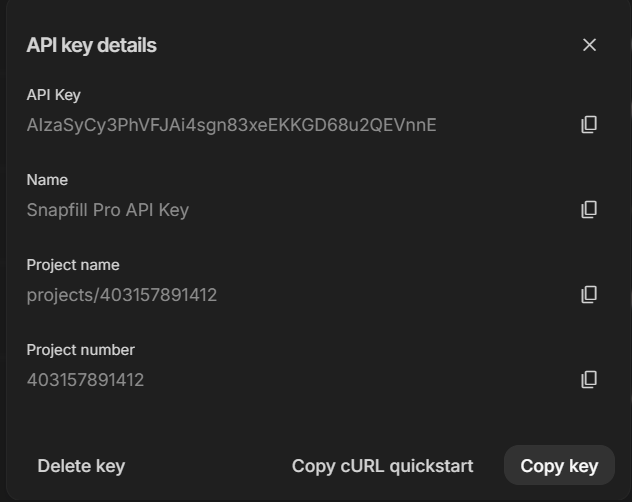
Copy the Key
Your API key will appear on screen — it will look something like: AIzaSy...XXXX (a long alphanumeric string starting with 'AIzaSy'). Click the copy icon next to it to copy it to your clipboard.
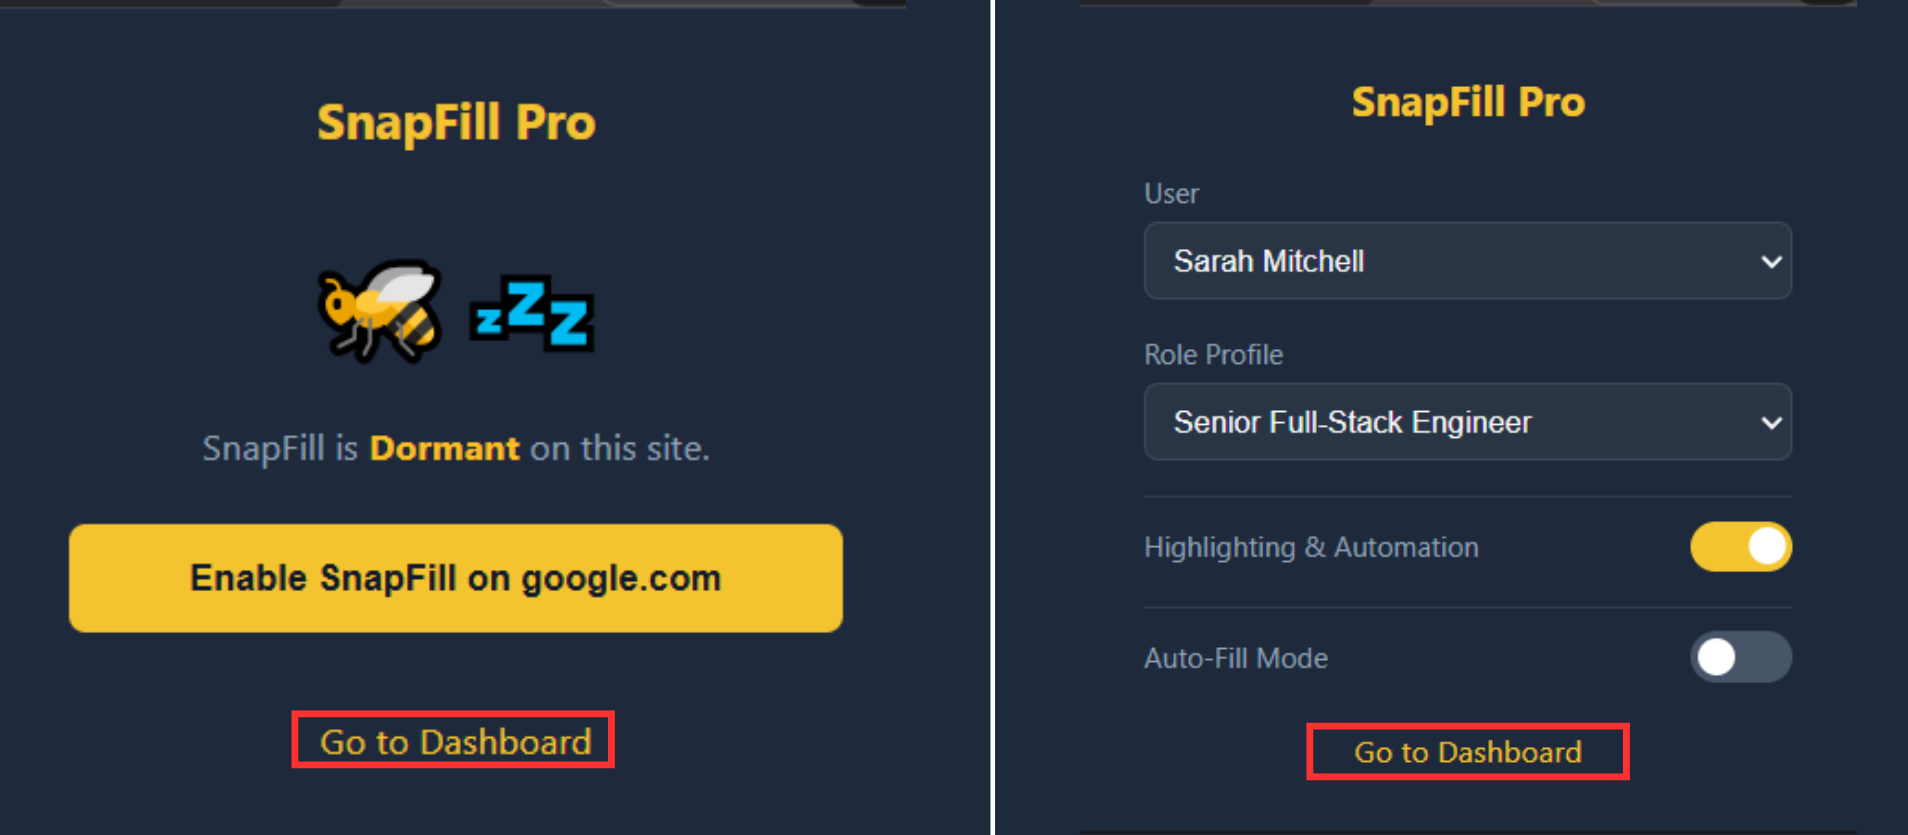
Open the SnapFill Pro Dashboard
Click the SnapFill Pro icon in your Chrome toolbar to open the popup. Then click 'Open Dashboard' to launch the full extension dashboard in a new tab.
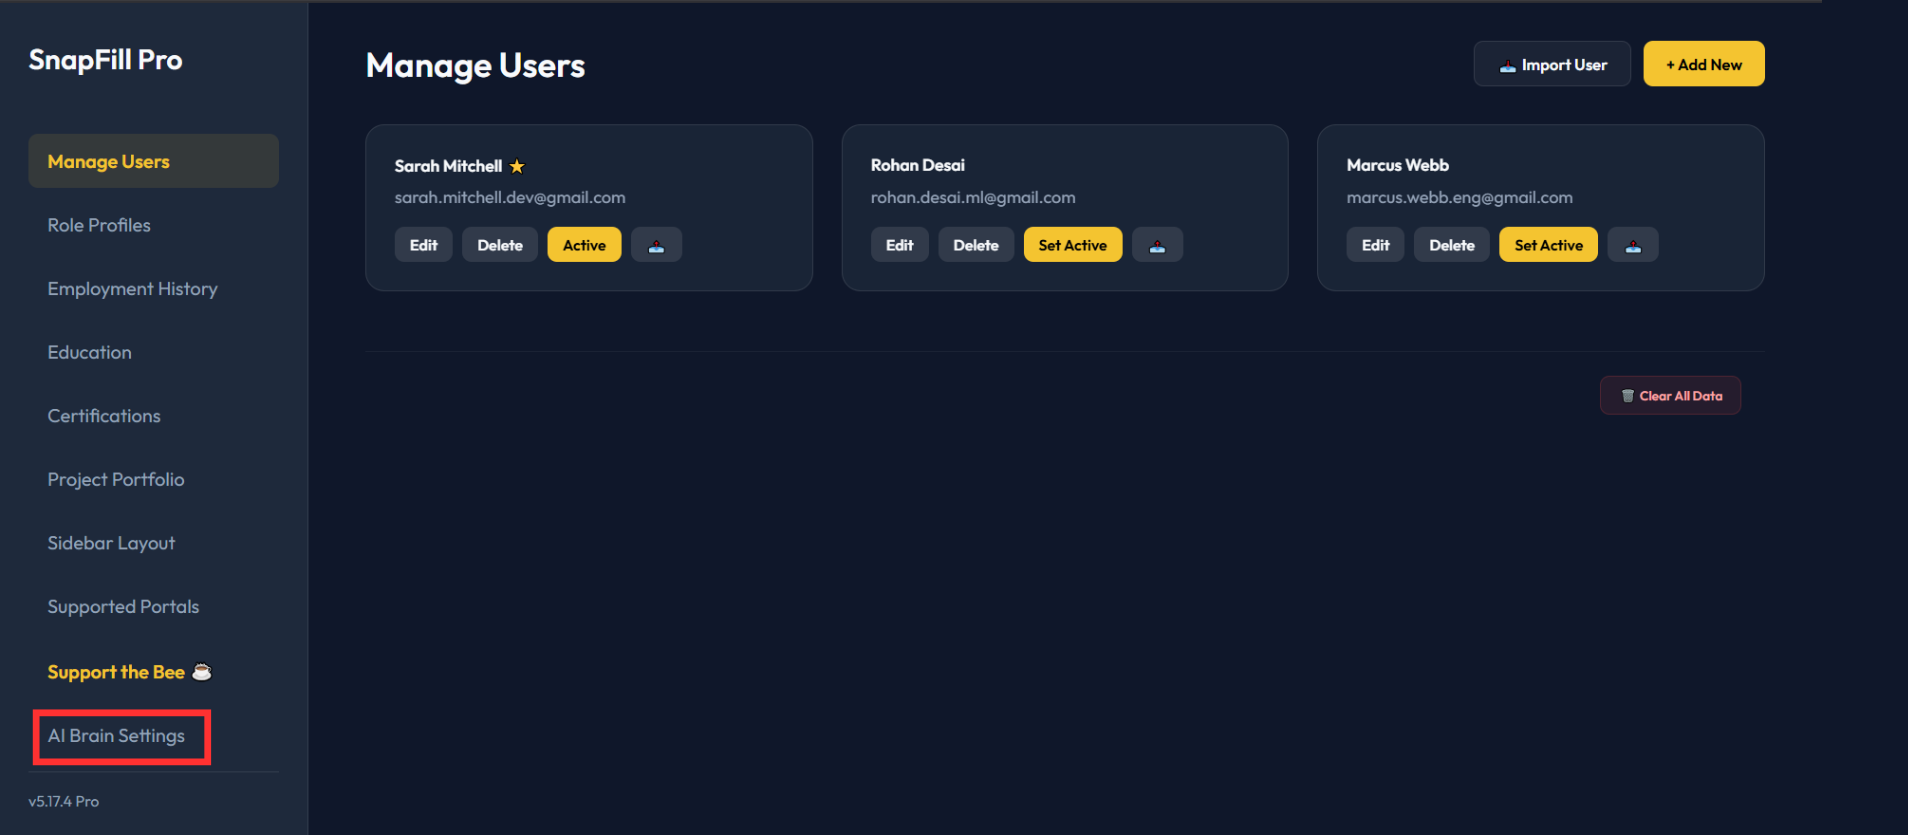
Navigate to AI Brain Settings
In the SnapFill Pro Dashboard, click on 'AI Brain Settings' in the left sidebar. This is where you configure your AI provider, endpoint URL, and API key.
Enter Your Key and Save
In the AI Brain Settings page: (1) Set the AI Provider to 'Google Gemini'. (2) The endpoint URL will auto-fill — leave it as default. (3) Paste your copied API key into the 'API Key' field. (4) Click 'Save' or 'Test Connection'. If the key is valid, you'll see a green 'Connected ✓' status indicator.
Use these exact values in the AI Brain Settings:
https://generativelanguage.googleapis.com/v1beta/openai/ gemini-flash-latest 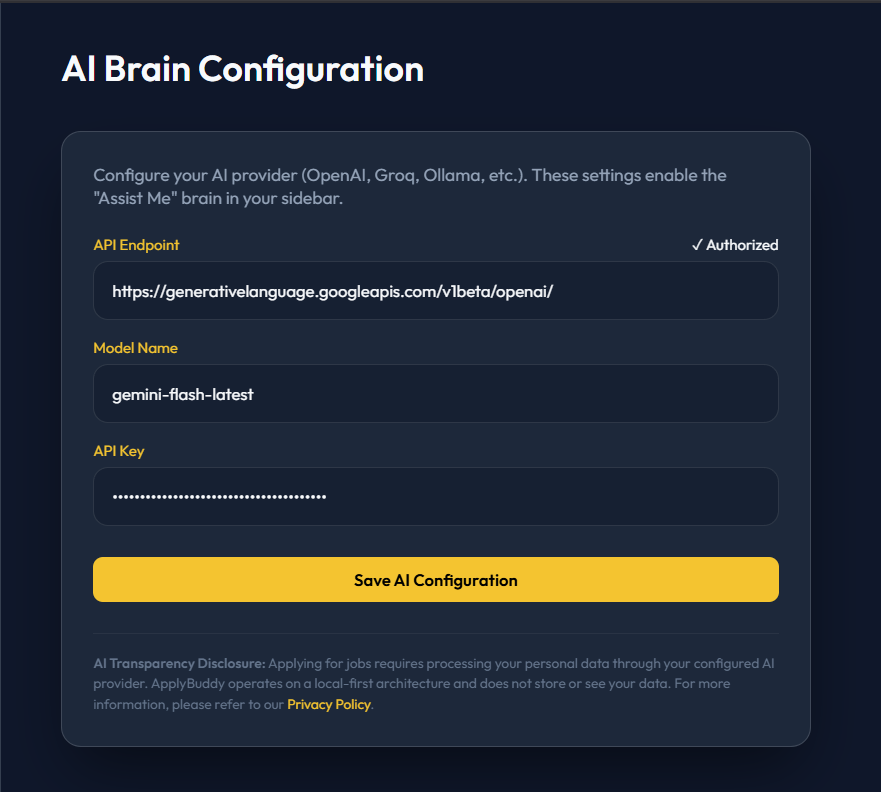
Common Questions About the API Key
All Set? Start Applying Smarter. 🐝
Your API key is configured. Now let SnapFill Pro do the heavy lifting.
Back to Homepage →