Up & Running in 3 Steps
From install to your first AI-powered application in under 5 minutes. No manual data entry required.
Install the Extension 🛠️
Add SnapFill Pro to Chrome — takes 30 seconds.
Add to Chrome
Click the button below to open the SnapFill Pro page on the Chrome Web Store. Click 'Add to Chrome' and confirm the prompt.
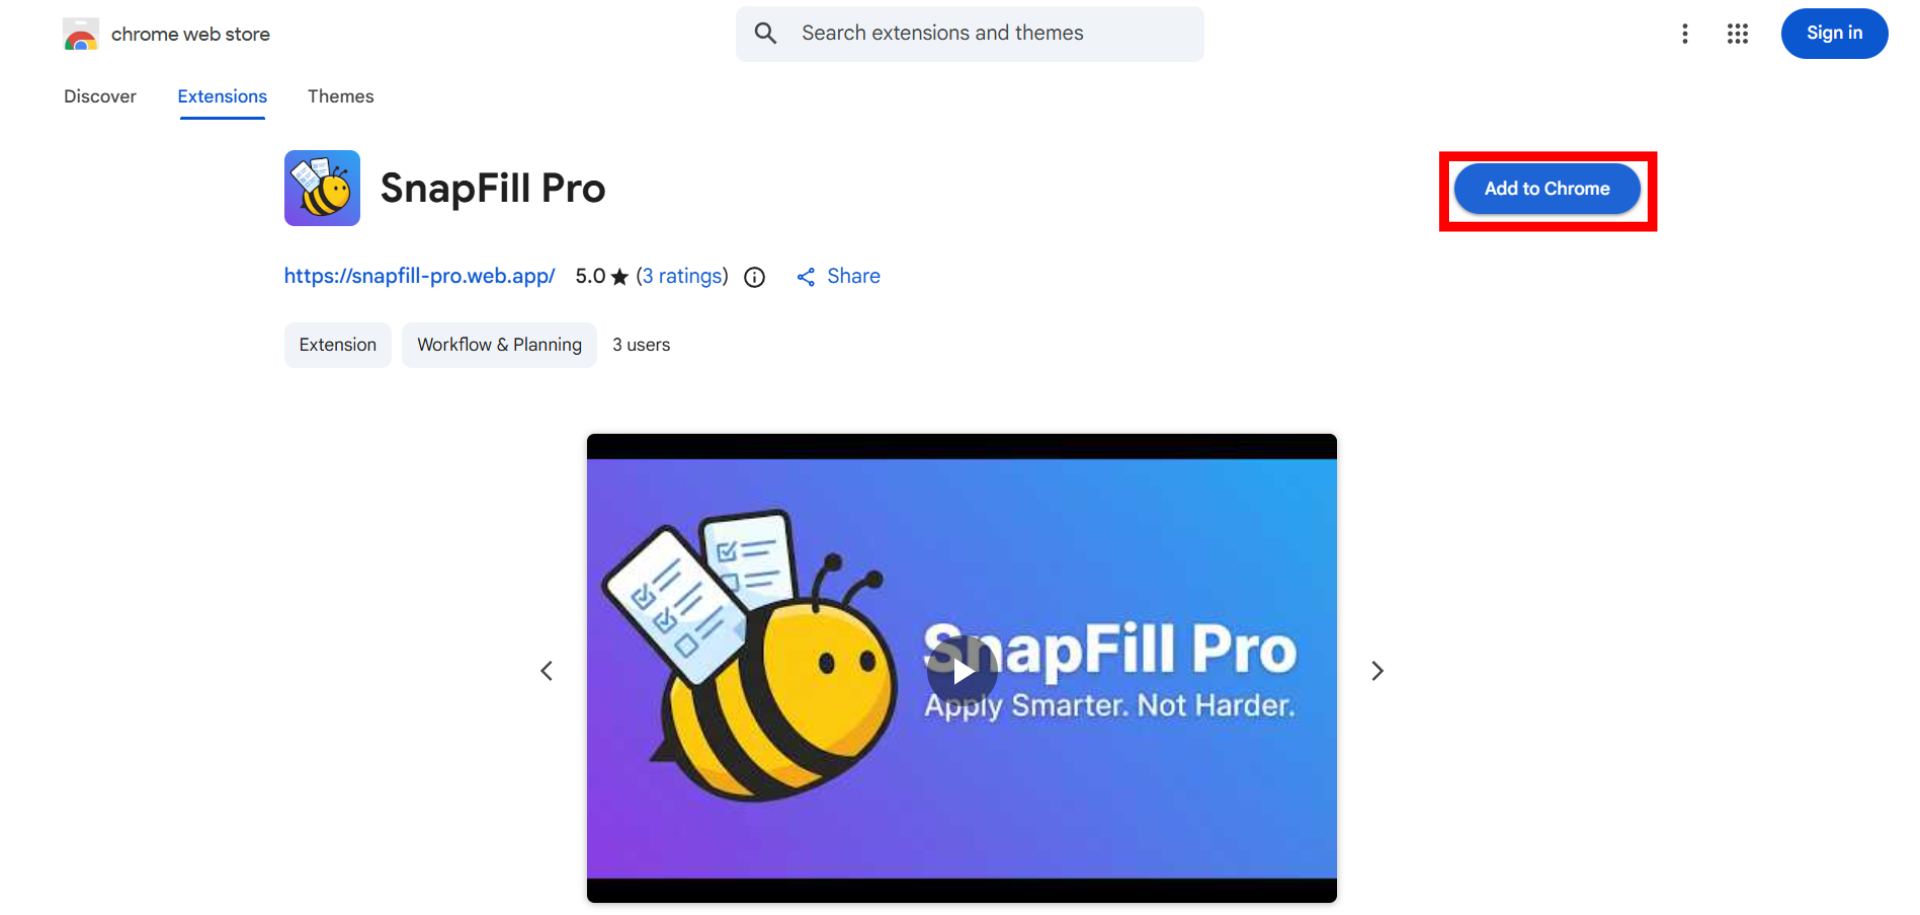
Open the Dashboard
Click the SnapFill Pro bee icon in your Chrome toolbar. In the popup that appears, click 'Open Dashboard'. This opens your command centre in a new tab — where you'll set up your API key next.
Add Your API Key 🧠
Connect a free Gemini API key — this is how SnapFill Pro thinks.
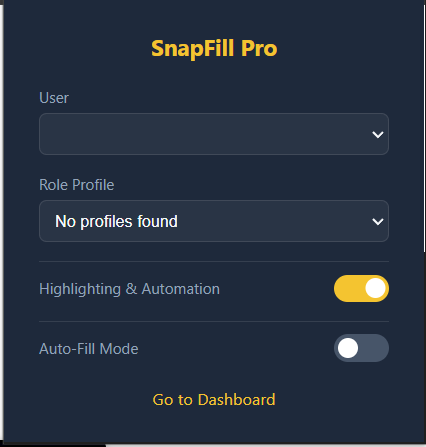
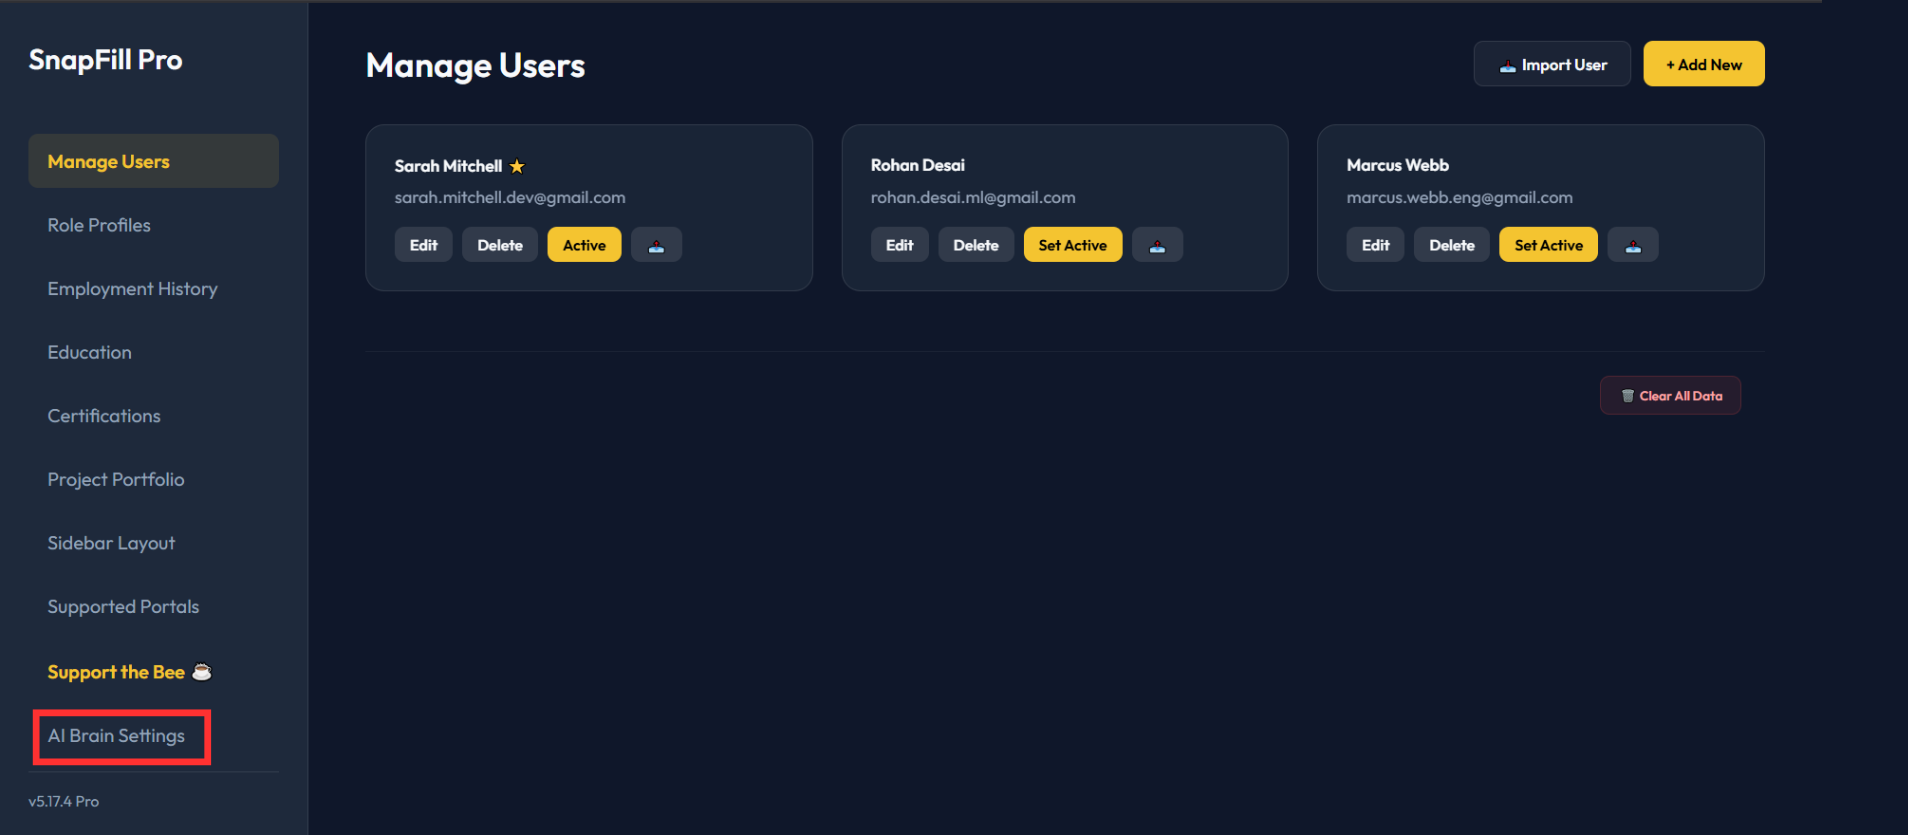
Open AI Brain Settings
In the Dashboard, go to Settings → AI Brain Settings in the left sidebar.
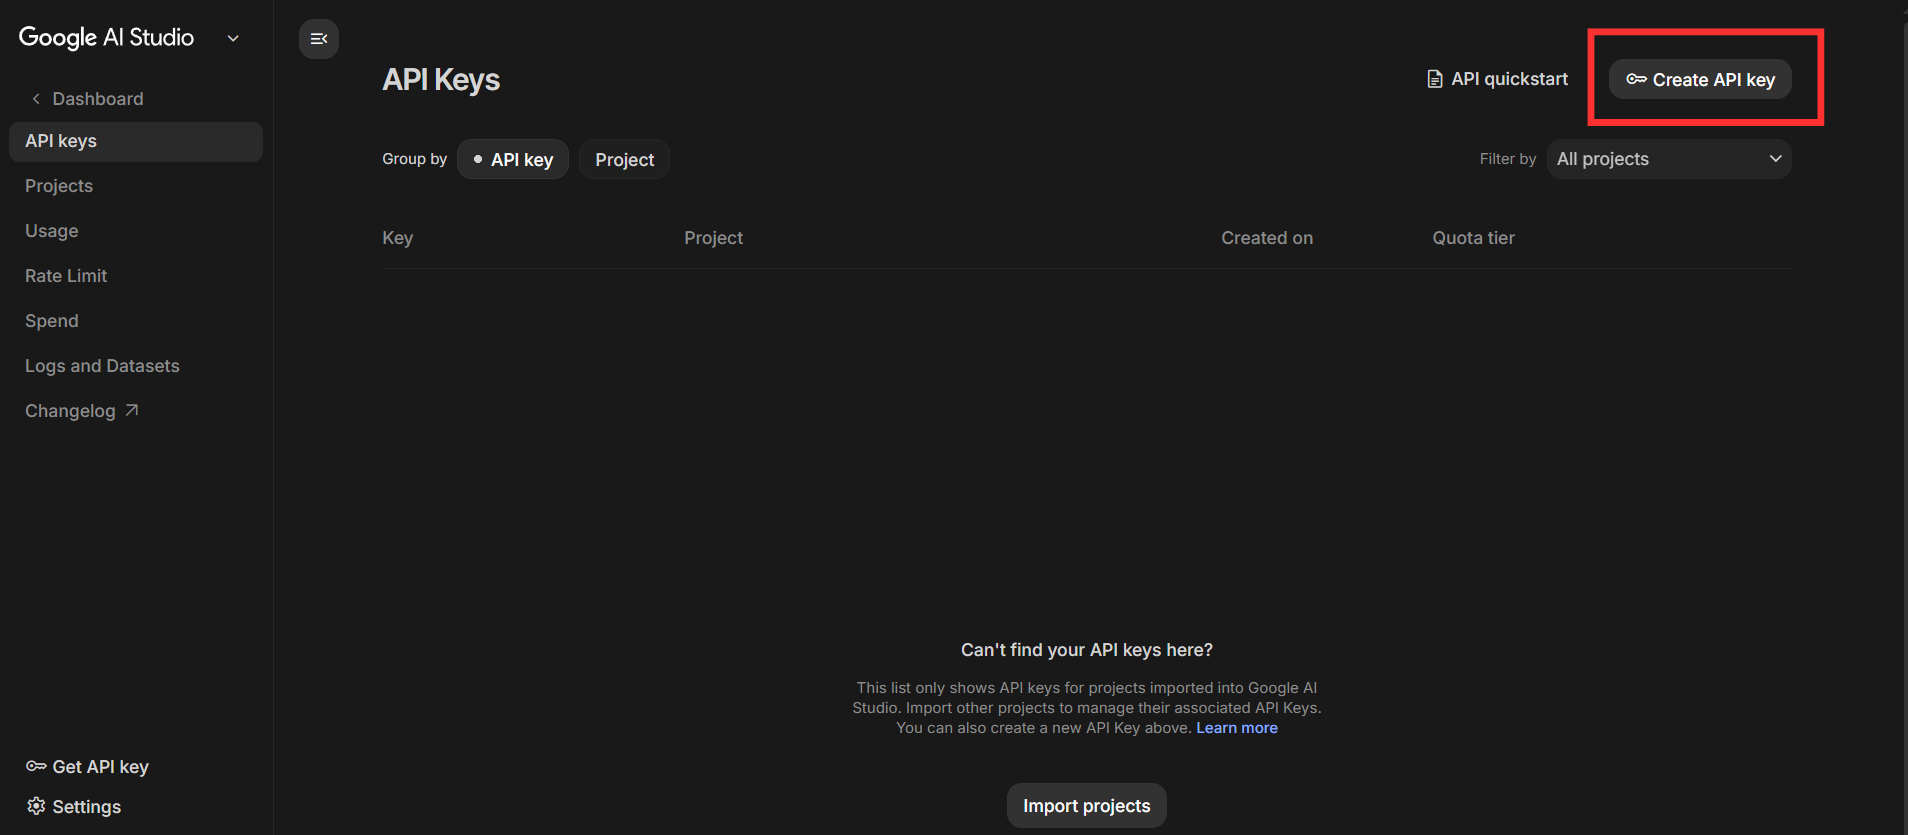
Get Your Free Gemini Key
Open aistudio.google.com in a new tab. Sign in with your Google account, click 'Get API Key' in the sidebar, then 'Create API Key in new project'. Copy the generated key.
Paste & Save
Back in AI Brain Settings: select 'Google Gemini' as the provider, paste your key, and click Save. Use these exact values:
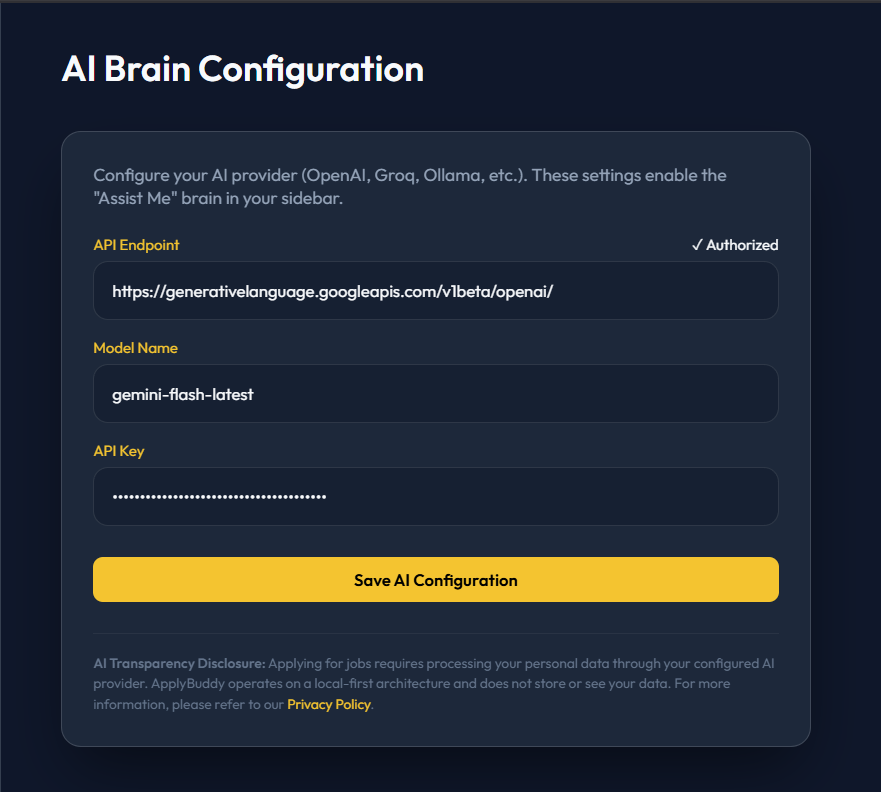
AI Brain Settings — use these values:
https://generativelanguage.googleapis.com/v1beta/openai/ gemini-flash-latest Drop Your Resume ✨
Your profile builds itself. No forms to fill, no manual entry.
Open Magic Import
Go to the Magic Import page (Resources → Magic Import in the top nav, or click the button below). You'll see the drop zone with an 'Extension connected ✓' indicator — this confirms the page is talking to your installed extension.
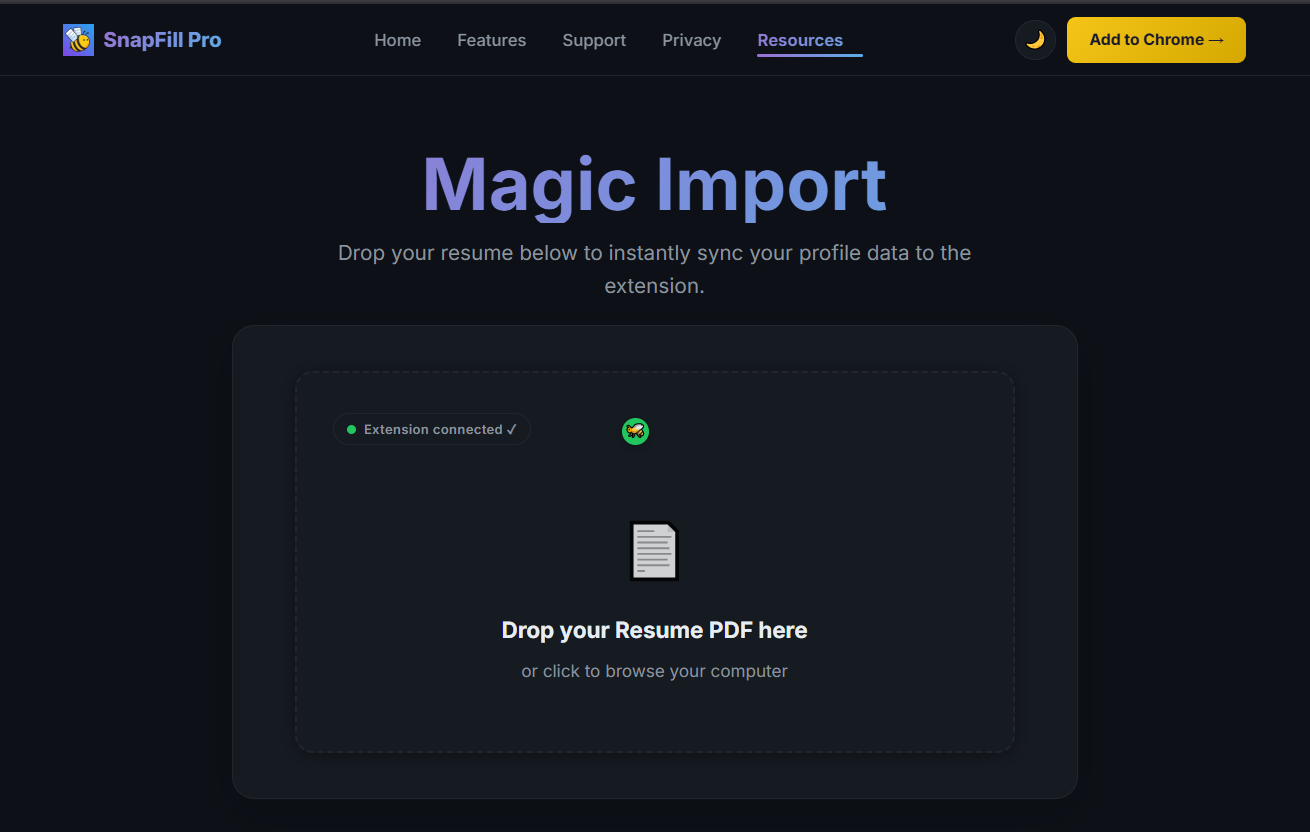
Drop Your Resume PDF
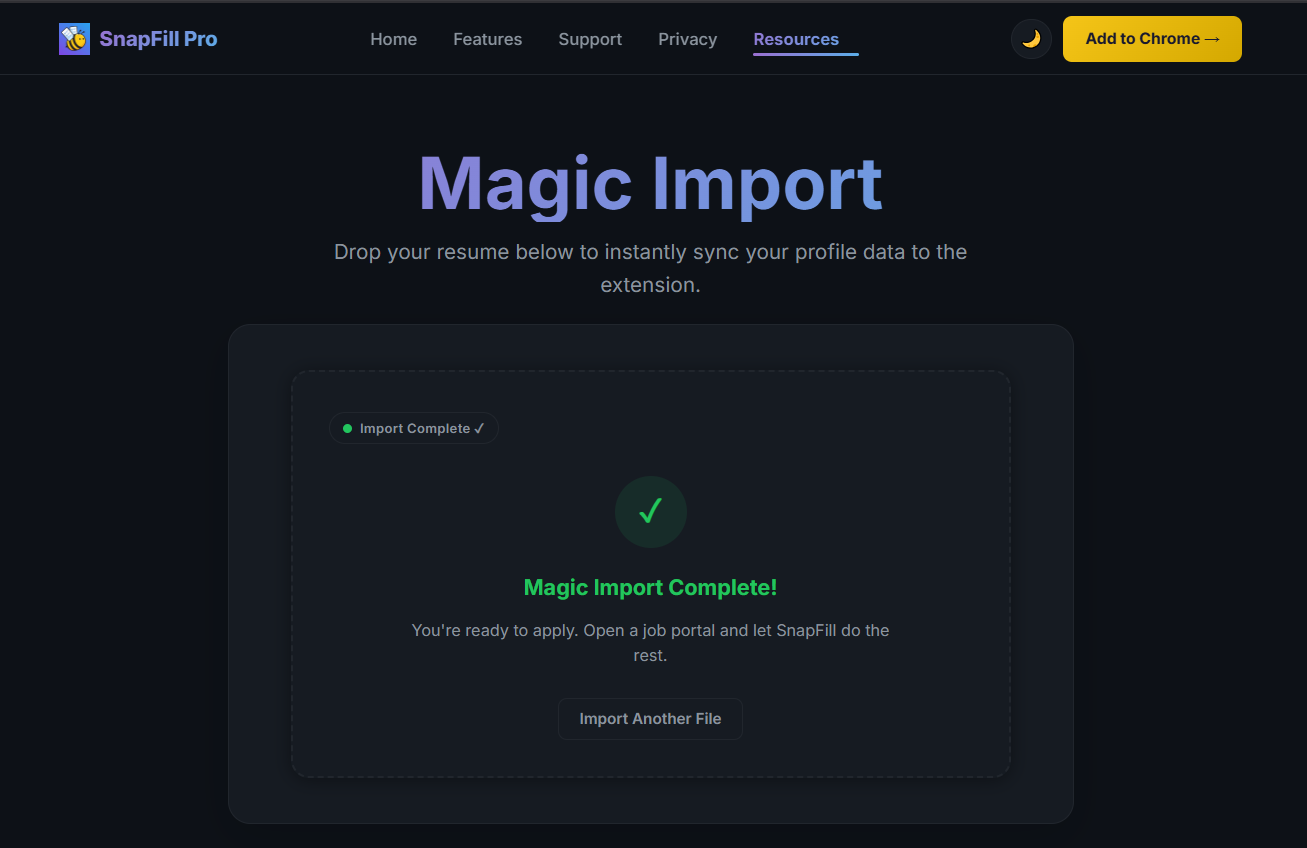
Drag and drop your resume PDF onto the drop zone, or click to browse. The AI reads it, extracts your employment history, education, skills, and projects, then syncs everything to the extension. You'll see 'Magic Import Complete!' when it's done — nothing else to do.
What Happens Next? 🐝
Magic Import handles the basics. Here's what you can do once you're set up.
Ready to Apply Smarter? 🐝
Install SnapFill Pro and let AI handle the heavy lifting.
Need help? Visit Support →